Wednesday, August 15, 2018

It's All in the Details: The Mystery of the 101st Row...

Hey all! Back from my hiatus. Saber Seminar was a lot of fun, and my talk--now posted on YouTube--was well-received. (Can't ask for more than that!) Now back to the Ty Cobb Sweater...

You may recall that, a couple posts back, I described the sweater's construction as "elegant." The sleeves are another example of that. They're also one of the better (and more subtle) demonstrations of the fact that this sweater was factory-made.

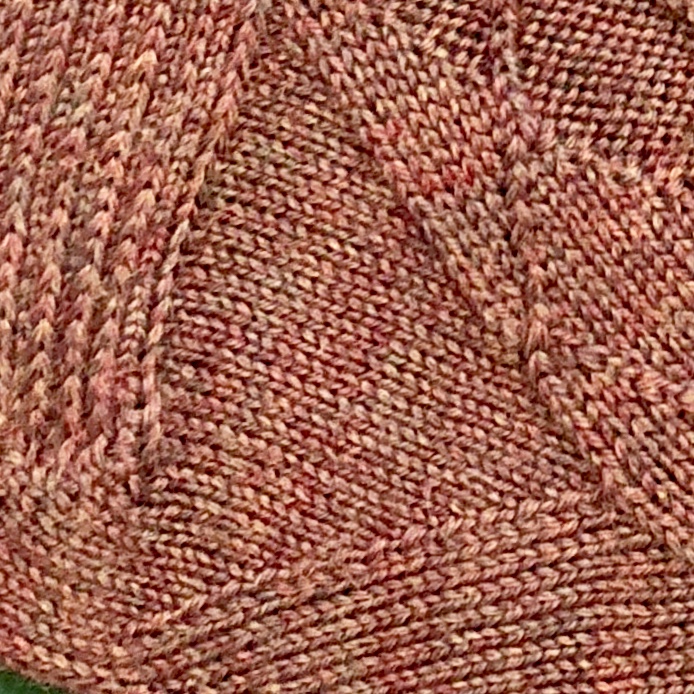
Picked-up stitches at top of sleeve
Unlike modern sweaters, one of the goals appears to be to minimize the number of seams (something I discussed when I talked about the shoulders). In fact, so important is that goal that gauge is occasionally sacrificed; put another way, the makers preferred to pull at the stitches and stretch the fabric rather than allowing it to lie flat.

Take a look at the sleeves. Rather than attaching them afterwards, every other stitch at the end of each row along the sleeve opening--yes, we're now knitting perpendicular to the body--is picked up and becomes a new stitch.
"Stretched" sleeve sts at shoulder (HOF Sweater)
Since the number of rows is less than twice the number of stitches for our gauge (15 sts and 22 rows/4", remember?), that means the stitches "spread out" at the shoulder and only gradually return to their original gauge.

However, the vertical body stitches don't make up the entire sleeve. You may have noticed in some of the body pictures that there were ten loose stitches at the bottom of each sleeve opening. This is an unusual design element (I'd certainly never seen it before), and all I can figure is that the manufacturer meant to simulate a "gusset." Until we started making armholes that curved in the same shape as sewn clothing, knitted gussets were common. A diamond would be inserted at the underarm, minimizing bunching and allowing the sweater to hang more naturally. While those ten loose stitches aren't an inserted diamond, they appear to serve the same purpose as a gusset, making for a more comfortable sweater (and incidentally, an easier knit).

Example of a typical diamond gusset
Sleeve opening (note loose sts at the bottom)


When working out the construction of the sleeve, I noticed something interesting that, once again, points toward mass production. The sleeves are exactly 100 rows long (actually, 101 rows long, but I'll explain why shortly), each of the decreases is five rows apart, the central portions are fifty stitches around, and the cuffs have twenty-five rows each. Needless to say, this struck me as odd, especially when you consider that the decreases are done in two sets--one near the shoulder and one near the cuff--rather than smoothly along the length of the sleeve. (Note: That splitting up of decreases was also new to me.)

Sleeve (reproduction) - note the two sets of decreases
All I can figure is that working in multiples of five and ten it made it easier for the workers to keep track. It also might explain why the sleeves were so long that they needed to be rolled up.

And now we come to one of my bigger mistakes. Having reached the end of the sleeves, I proceeded gamely on to the ribbed cuffs. No, they didn't really look like the ones on the original HOF Sweater, but I knew from our only picture that Ty Cobb had rolled up his sleeves, and even that there was a run in one of the cuffs. I figured that maybe wear-and-tear had stretched out the cuffs, leaving them shorter and with a tighter gauge.

Cuff - HOF Sweater (Note the unraveling...)
When will I listen to my own explanations?!?! After all of my earlier concerns with gauge, I of all people should know that wool simply doesn't do that. Sure, if you wash wool in hot water, it will shrink (and mostly vertically), but there was no sign of that here, and the rest of the sweater was pristine. Not only that, but when I looked at pictures of some of the other Hall-of-Fame sweaters, the cuffs were identical. Clearly I had screwed up. The question was: HOW?

So, back to the pictures I went...where I discovered something very strange. [insert Twilight Zone music] Looking very carefully (and this is nit-picky enough that I won't bore you with visual examples), I could tell that the ribbed cuffs (a) had a much tighter gauge and (b) had clearly been worked from the bottom up. That made absolutely no sense. Clearly the sleeves had been worked from the shoulders down, meaning the only way to make those cuffs  would be to start them separately (on much smaller needles) and then attach them using a Kitchener Stitch (such as we saw with the shoulders). Who the %&*! would do that?!?!

And then I remembered that 101st row... And the light dawned. [insert angelic choir]

Cuffs (reproduction) - Left cuff is correct; Right cuff is WRONG
Remember that this sweater was made in a factory, meaning that one garment was probably made by multiple people. It's unlikely that whoever was knitting the sleeve would switch to smaller needles for the cuffs. Rather, it was probably quicker and more cost-effective to have somebody else make cuffs and only cuffs, which would then be attached to the finished sleeve. Since the attachment clearly used a Kitchener Stitch, that would explain the 101st row. It would also account for the placement of the ladder on the original sweater, since the obvious place to start/finish grafting would be at the center back of the cuff (where the decreases are). If the Kitchener Stitch row hadn't been finished properly, one end might have come loose, which would explain why the ladder occurred there (and also why the edge of the cuff itself was still intact).

So, what to do? If I was going to be truly historically accurate, the obvious thing would be to make the cuffs separately and attach them. Here, however, I took a liberty. After all, part of the point of this project is to create a pattern that can be made at home by an average knitter. Asking somebody else to make cuffs in this way--rather than simply switching needle sizes and continuing to the end--seemed to be design ad absurdum. Therefore, for my own sanity and everybody else's, I chose to do the logical thing, rather than the historically-accurate one, and work the cuffs as a seamless part of the sleeve. Was it the right decision? I don't know. However, if it took me that long to figure out the small oddity in cuff construction, hopefully nobody else will even notice. (And yes, if enough people really care, I'm happy to include two versions of the sleeve construction in the final pattern.)

Thursday, July 26, 2018

Work-in-Progress: Status of the Ty Cobb Sweater, July 2018

As I warned you in my last status update, the changes to the Ty Cobb Sweater from here on out will seem less dramatic. Not that I haven't been working hard on it, but now it's mostly fiddly bits and hidden details.

Ty Cobb Sweater reproduction with pockets and updated cuffs
Finished pocket
I should start by making a confession: the cuffs of which I was so proud in the previous status update turned out to be wrong. That meant ripping them out, reexamining my pictures closely, knitting multiple swatches until I got the gauge I needed, and finally redoing them. (I'll go into the gory details in a future post.) The good news is that the cuffs are now correct. They look great, they match the HOF sweater perfectly, and redoing them actually taught me a lot about historical factory knitting.

Knitting at the ballpark. Why not? ;)
Placket in progress
The pockets are also finished--again, fascinating construction that we don't see anymore--and I've started work on the button placket. Since it's the only part of the sweater that's sewn on afterwards, all I really have to show so far is a long strip of knitting that will get even longer. While that's pretty boring compared to the rest of the sweater, it's also a lot more portable, which meant I was able to work on it during the Rockies-Dbacks game last weekend. (There's nothing quite like watching people react when they realize you're knitting while watching the game. ;)

Since the Saber Seminar is next weekend (August 4-5) and I'm giving a talk on my baseball laces research, I'm planning to take a week off from blogging. Hopefully I'll get a lot of knitting done though. Anyone who has seen me at a conference can attest to the fact that I knit during talks. (It helps me pay attention. Weird, I know, but true.)

Thursday, July 19, 2018

It's All in the Details: A Tale of Two Design Elements

"It was the best of design elements. It was the worst of design elements..."

In this case, I'm talking about the neckline and the shoulders of the Ty Cobb Sweater.

Neckline decreases. (left: HOF; right: reproduction.)
Example of "smooth" decreases
The neckline is one of those construction details that left me scratching my head. It's the first time we run into "shaping"--that's just a fancy way of saying stitches are being increased or decreased--and considering the clean, simple lines everywhere else on the sweater, the method used here was a little jarring. (Well, okay, for a knitter it was a little jarring).

As you can see, the neckline tapers from the button placket to the shoulder. Generally when I've seen stitches decreased, the idea is to create a smooth line, so that one part of the knitting looks like it's going underneath. You see that kind of "smooth" decrease most often on socks, as I've shown in a close-up from one of my own designs. However, for the Ty Cobb Sweater, the neckline decreases go the opposite way (note the red circles), which makes them stand out. When I first saw that shaping, the lack of aesthetics almost made me cringe. (Sorry. That's my inner knitting designer talking.)

Example of mattress stitch join (inside).
What really confuses me is WHY? It's not as if "smooth" decreases are harder to knit than the ones used here. I don't have much basis for comparison, but since this type of shaping appears on all of the other baseball sweaters I've seen, I can only assume it was standard at the time.

Fortunately (at least for my inner designer), the lines everywhere else on the sweater are GORGEOUS--so nice, in fact, that the question becomes, "Why aren't we still making them this way?"  I don't mean mass-produced sweaters either; even hand-knit ones no longer have such elegant construction.


The nicest example appears at the shoulders. Nowadays, shoulders are either attached together using a sewing machine (this is generally seen with store-bought sweaters) or something called a "mattress stitch." While a mattress stitch join can be pretty on the outside, it leaves a thick seam on the inside.

Original HOF Sweater shoulder join, outside and inside
However, if you look at the original HOF sweater, you'll notice that the shoulders are, quite literally, seamless. Now, if you remember my pictures of the finished body, that might not make sense at first. After all, the body is knit flat. How can you attach the front and back together without seams?
Grafting the shoulder using a Kitchener Stitch

Well, obviously there have to be seams; they're just invisible. It turns out that if you use a form of grafting called a "Kitchener Stitch," you can use a sewing needle to create the look of knitted stitches. (Note: For you history buffs, yes, the technique was named for Lord Kitchener, although clearly it predates World War I. Heaven knows what it was called before that.) It's a standard technique for closing the toes of hand-knit socks, but it's not often found in shoulders. As you can see, my Kitchener-Stitched reproduction ends up with shoulders just as pretty as those on the original.
Reproduction with finished shoulder join


From here on out, the design elements continue to be both graceful and logical--except for those damn decreases. (Yes, there are more of them.) Obviously, if I were the one designing the sweater, I'd do them differently. However, since the point is an accurate reproduction, I've just sucked it up and moved on. Whatever.

Thursday, July 12, 2018

It's All in the Details: Ty Cobb, that Snappy Modern Dresser!

The body of the Ty Cobb Sweater reproduction
In some ways, the body of sweater is the simplest part to knit and understand. (For you beginning knitters out there, this will be the most straightforward part of the pattern.) In others, its construction leaves me flummoxed.

Ironically, what's least comprehensible is its very simplicity. Being a cardigan, the body is essentially flat, but its lack of side seams makes it wide to the point of being ungainly. In a factory setting--such as that in which the Ty Cobb Sweater was made--one would think a hand-cranked knitting machine makes a lot more sense.

But then you get to the details. It turns out the body is not a flat rectangle, and the hem, pockets, sleeve openings, and neckline (the last three of which I promise to talk about in upcoming posts) are worked in a way that could only have been done by hand. In theory, whoever made the sweater could have switched between a knitting machine and hand needles for certain parts, but frankly that seems like a waste of time and energy. (Why use a knitting machine to knit 5 inches, take the piece off to work the hem by hand, put it back on the machine to knit another six inches, take it off to manually insert the pocket openings, put in back on...? You see my point.) This leads me to believe that, onerous as it was, the body was hand-knit.
Circular needle (upper left) and DPNs (lower right)

19th century example of knitting using DPNs
Since we're in the 21st century, I used "circular needles" to make the reproduction. For those of you unfamiliar with knitting, circular needles consist of two needles joined by a stiff cord (see pic); they are, in effect, one very long flexible needle with two ends. If you're knitting something as wide as a 42-inch sweater body, circular needles are really the only way to go.

Interestingly, the very nature of the Ty Cobb Sweater may be linked to the invention of circular needles. As far as I can tell, there seems to be a transition just after 1900 between pullover baseball sweaters and cardigans. These pictures of Cy Young and the Washington Senators (shamelessly lifted from BSmile's Twitter account) are from 1898 and 1895, respectively. Note that, in both cases, the sweaters are pullovers.

Cy Young - 1898 Cleveland Spiders (pic via @BSmile)
1895 Washington Senators (pic via @BSmile)
Unlike cardigans, pullovers can be made using "double-pointed needles" or DPNs (see pic). In fact, until the introduction of circular needles, sweaters were generally knit on DPNs. The advantage of DPNs is that you can knit something "in the round" using as many needles as you want (hence the two girls in the picture knitting a single sweater on a half-dozen very battered knitting needles). Unfortunately, if you want to knit something flat--especially something heavy and flat--you run the risk of dropping stitches between needles when you get to one of the ends. In short, there's a good reason that fisherman's sweaters or ganseys are pullovers; cardigans were simply impractical.

However, the first circular needles were patented in the US in 1918, and were likely in use for some years before that. I would guess that the introduction of circular needles and the sudden widespread appearance of factory-made cardigans was not a coincidence. In the 1900s, working with circular needles would have been considered the height of modernity and knit cardigans the height of fashion.

Unlike pullovers, cardigans could be used as a "substitute coat," making them far more convenient. (Think of it as the difference between a regular hoodie and one with a zipper.) Since sweaters don't generally crease or wrinkle, they also had the advantage of being more forgiving with regards to packing and storage. Sounds perfect for someone on the road half the time, don't you think?

Thursday, July 5, 2018

It's All in the Details: Getting Hemmed in

Carding room at the Mishawaka Woolen Co, c.1902
Anybody reading this blog (with apologies to all of my octogenarian fans :) has grown up in an age where clothing is largely machine-made. Not just made in factories, but literally machine-made. Occasionally you'll run into details--beaded trim, say--that have clearly been stitched by hand, but those are usually manufactured overseas to take advantage of low-wage labor. Many of us aren't even aware that, until about the 1970's, it was often easier and more economical to make your own clothing than buy it off the rack.  (See? Those seemingly-obsolete Home Ec classes we took in high school once existed for a reason!) Since fabric was woven (i.e. no stretch) rather than knit, knowing how to sew meant that, at the very least, you didn't have to pay for the alterations needed to make your clothes fit.

MLB baseball lacers at Rawlings' factory in Costa Rica, 2017
Nowadays, people associate handmade clothing either with haute couture fashion designers or hobbyists. We forget that, up through the first half of the 20th century, an entire industry existed in this country where people made knitted garments, and many of those garments were made by hand. I'll admit that I haven't had much success tracking down manufacturing details, but as far as I can tell, things like the Ty Cobb Sweater were done entirely "by hand." As in by one person (or group of people), on knitting needles. Some parts may have been done by machine--not an electric machine, but something hand-cranked--but, by and large, these sweaters were handmade. Factory-manufactured, but handmade. (An interesting aside: one thing that is still "factory-manufactured but handmade" is a baseball. To this day, no one has figured out how to lace a baseball by machine, so every baseball used in every game--even in Little League--is hand-laced.)

Hem on the original Ty Cobb Sweater (outside)
So I guess the question is: Why do I think that? What's the giveaway that suggests people, not machines, made Ty Cobb's sweater?

It turns out you can tell right from the beginning--as in, starting at the hem. (For those of you unfamiliar with knitting, sweaters are generally made from the bottom up.)

Hem on the original Ty Cobb Sweater (inside)
Hem on the reproduction (outside)
Hem on the reproduction (inside)
Take a look at the hem on the original HOF sweater. You'll see immediately that it's very different from the ribbed bottom cuffs we associate with knitted sweaters today. This is much more like the hem on a sewn piece of clothing. However, unlike sewn clothing, this hem is not stitched in place using a machine. Instead, it is knit-in. The bottom is folded over, and the stitches from the original edge are literally knit together with a later row. (Note: I apologize for the extremely poor photograph of the inside of the hem on the original. Apparently, I thought the technique was so self-evident that I didn't bother to take a decent picture at the time. Granted, when I took those pics, I also didn't think I'd be writing a blog.)

To my knowledge, knitting stitches together is not something that lends itself to machine-knitting, even hand-cranked machine-knitting. While this is not a technique that's used often in hand-knitting today, it's not unheard of, and I was able to reproduce it without too much trouble.

It's also the first example of a construction detail that appears to have been standard at the time but has since been lost to history. (So far, all of the historical baseball sweaters I've encountered have similar hems.) As we move up the sweater, we'll see more of those. Some make sense, some are counter-intuitive--if not downright head-scratching--and some only seem counter-intuitive until you remember that these were made in a factory, not in somebody's home.

More surprises to come!

Wednesday, June 27, 2018

Work-in-Progress: Status of the Ty Cobb Sweater, June 2018

(Wow! Work-in-progress updates two months in a row. This is great!)

You'll be pleased to know that the Ty Cobb Sweater is coming along nicely. Last month, it was just a flat piece of knitting that, when strategically folded together, gave the impression of a sweater. Now...drumroll please...it will, in fact, pass for an ACTUAL SWEATER. The shoulders are stitched together, both arms are attached, and the cuffs are finished. (Note that all of these are construction details that will be addressed in future posts.)

Ty Cobb Sweater reproduction, now fully armed!

I've tried the sweater on and discovered that
  1. it's absolutely as heavy as you'd expect, 
  2. Ty Cobb was bigger than me, though not by much, and 
  3. I now understand why the only picture we have shows him wearing it with the sleeves rolled up. Man, those cuffs are long! 
Ty Cobb in the original sweater. Note the rolled-up sleeves.
As you can probably guess, construction is getting into the home stretch. All I have left are the pockets, the button placket, and the Tigers logo. Unfortunately, as with any home stretch, those are the most difficult parts. In other words, the next work-in-progress update is unlikely to be as dramatic as this one. On the other hand, solving the hardest problems always provides a great deal more satisfaction, so you're likely to see me showing off even tiny details. It comes with the territory, I suppose.

Wednesday, June 20, 2018

The Learning Curve: Building the Armor

[Author's note: From this point forward, there will be a lot of comparison pics between the original Ty Cobb Sweater and my reproduction. Despite my best efforts, the sweaters appear to be radically different colors. This is purely an effect of the lighting, as I use LED bulbs in my home. Both sweaters are, in fact, light grey and as close a color match as I was able to come up with.]

Podcast on "Charity Crafting"
I'm always amazed at serendipitous coincidences, when things come together exactly when you need them to and in exactly the right order. In this case, shortly after my second Hall of Fame visit, I was invited to do a podcast with Knit Picks about "Charity Crafting." (Here's the iTunes link; it's Episode 252 and my segment starts at 25:45.) While the podcast focused mostly on my baseball yarn projects (See? Even then, I was tearing apart baseballs.), that interview made me realize that, since the Ty Cobb and ECL Sweaters would ultimately be donated to charities--both the Hall of Fame and the Negro Leagues Baseball Museum are 501c(3)s--maybe Knit Picks would be willing to donate the yarn. At least it couldn't hurt to ask...

So I asked.

To my astonishment and delight, Knit Picks was entirely onboard, even to the point of shipping me the yarn at various points along the road trip I was then taking. (I honestly can't say enough good stuff about them and their enthusiastic involvement. Talk about a business run by good people!)

So there I was, with more pictures, more measurements, a better "feel" for the sweaters, and more than enough yarn...and I still couldn't get the stitches right; I certainly couldn't produce something with that "armor-like" weight.
A partially-unlaced baseball. Note the double-stranding.

And then I had one of those "aha!" moments. Interestingly enough, the idea came from the baseballs I had been unlacing for my baseball yarn projects. I noticed that, to strengthen them, each seam was stitched using TWO laces, not one. While the analogy wasn't perfect--I needed heavier stitches, not stronger ones--using two strands was certainly a straightforward way to mimic thicker yarn, and at the very least, I knew I needed that.

Single-strand stitches
Stitches from the original Ty Cobb Sweater


So I tried it...and miracle of miracles, I'd hit on the solution! Not only did two strands give me the correct gauge, but the stitches were wider-looking and denser. Even better, the fabric was heavy--as in armor-heavy. As far as I can tell, the reason you get heavier fabric is that you're sort of squeezing two stitches into the space normally taken up by one. I'll admit that I don't entirely understand why it works that way, but the point it that it does work, so who am I to question?

Double-strand stitches
Finally, I was in a position to start making the actual reproduction. (Yippee!) So I cast on and got to work. I quickly discovered that knitting armor is HARD. Not only are the individual stitches tighter, but the project itself quickly becomes heavy, meaning your hands and forearms get fatigued and sore. That's probably part of why I haven't been putting as much time as I should into the Ty Cobb and the ECL Sweaters. I like not having arthritis, and I'd prefer to keep it that way. :)

Fortunately, dedication (plus Advil) is now winning out, and even as I write, the second sleeve on the Ty Cobb Sweater is nearly finished. I'll put up more "in-progress pics" soon, but the next few posts will focus on construction details. They're things I find fascinating, and hopefully you will too, if only because we simply don't make clothing this way anymore. Think of it as baseball, knitting, and history, all rolled into one.